I spotted a guide like this on a different blog, and I thought ‘I should make one too!’ hehe.
I have therefore made one using three different solutions and three different programs. All are completely FREE to use, one is downloadable, one comes with every PC and the last one is online.
With the internet today things spread very quickly and for some parents, the thought of showing your child’s identity online is something they are not comfortable with. This is perfectly OK of course and I understand the hesitation.
However, as I do most of my advising of car seat use online I sometimes do ask for pictures of the children in their car seat to judge if it’s outgrown or to simply try to visualise why the person needing the help is having a problem.
I then sometimes get told that they are not comfortable with sharing their child online, and that is as I have mentioned perfectly OK and should be respected.
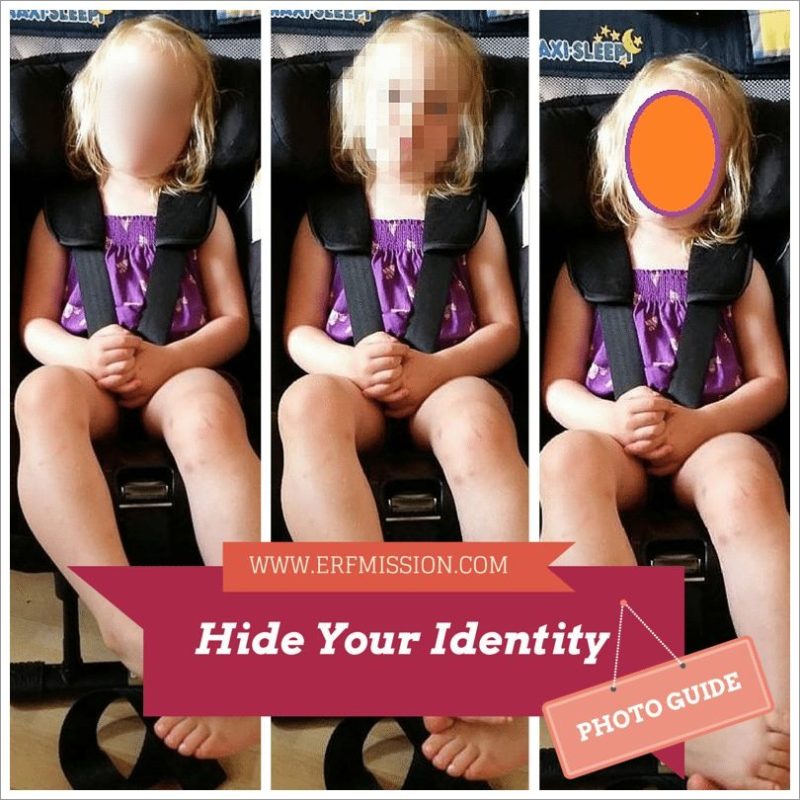
To get around this so to speak, I often tell them that they can just ‘hide’ their children’s identity simply by masking their face, but many don’t know how to do this, so because of that I thought I would share with you all my tips on how to do this in this tutorial: Hide Your Identity – Photo Guide
Starting off…
The very first thing you want to do is to find the image you wish to ‘edit’. I am using this amusing one of my daughter:

After you have found your image there are three ‘edit programs’ I recommend from personal experience and ease of use.
- PhotoScape (download here)
- Picmonkey.com (web)
- Paint (yes, good olé paint!)
Let’s start off with PhotoScape and how to ‘Blur’ the image, in this case, the face it self:
When you have opened PhotoScape it should look like this, for this tutorial we want to select ‘Editor’.

When you have opened PhotoScape and selected ‘Editor’ you want to select your photo in the left menu and then at the bottom on your right in the program you will see this bar:

I have highlighted what you want in orange. The top one is the size of the ‘brush’ and at the bottom is the ‘Effect Brush’ button.
Clicking the ‘Effect Brush’ button should give you a load of options in a drop down menu like so:

I have chosen to use the ‘Blur-High’ as I found that to be the best, but as you can see there is a choice of three ‘Blur’ options.
Once you have selected your choice, click on it, make sure you have selected your size of the brush, I personally for these sort of things fancy the biggest one, but smaller ones are available as well as you can see.
Now it’s time to ‘hide the identity’. Take your brush with blur that you have selected and start ‘painting’ on the face, it should start to look like this:

Now you can either leave it like this with no the whole face covered, or you can choose to blur a wider area, I chose the wider area:

And there you have it! My child now has ‘a hidden identity’ using blur.
Another method is to ‘pixelate‘ the image.
You follow all the same steps as above, except you change ‘Blur’ for ‘Mosaic’, like this:

I also chose to have the smallest brush for this as that gave me what I felt was the best pixelation on the image. :)

Let’s move on to Picmonkey… and how to pixelate the face there:
‘Picmonkey’ is an online photo/image editor and you will find it by putting www.picmonkey.com in your web browser, or simply using Google will also work.
Once you have done this the website should load and you will be faced with this:

For our tutorial you want to select the ‘Touch Up’ option, and this will open up your computer files as default, where you will choose your photo from wherever it is you have it saved on your PC.
Other options for uploading the photo is ‘Facebook’, ‘Dropbox’ & ‘OneDrive’.
Once you have selected your photo you will be taken to the ‘Studio’ and it should look something like this by default:

Lots of choices but we are looking for the ‘Effects’ and in there you will scroll down to find ‘Focal Pixelate’
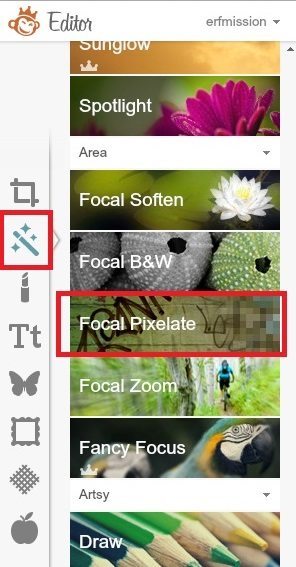
Select this and a small menu should drop down from it, like this:

You will now see that everything but where you have your focal point is pixellated.
But you only want the face, so just move the focal point to the face (as I have done) and you can see that her face is now in focus and clear.
But we want to make only the face pixellated, so you will need to tic the small box saying ‘Reverse Effect’ located just above the green ‘Apply’ button:

And there you have it!
Feel free to play with the settings on sizes of the pixels, the size of the focal point and so forth.
This is how mine looked in the end:

And last but not least… let’s move on to something that isn’t quite as “fancy” looking, but still does the job very effectively, PAINT.
‘Paint’ is a default program that comes on every PC, you are most likely to find it already staring at you from the ‘Start’ menu.
If it’s not there, you will find it by simply searching for ‘Paint’ in the search bar at the bottom of the ‘Start’ menu (or ask Cortana)
Open up the program, open the library to find your image:

Now at the top you can see a selection of shapes and colours.

Select your shape (I went with an oval), next to it is the ‘Fill’ button, you want to make sure this is set to ‘Solid Colour’ and to the very right you have your selection of colours. Colour 1 is the border of the shape Colour 2 is the filled colour inside.
I chose an orange border with a purple filling:

I then made the shape the size I wanted and moved it around until I was happy.
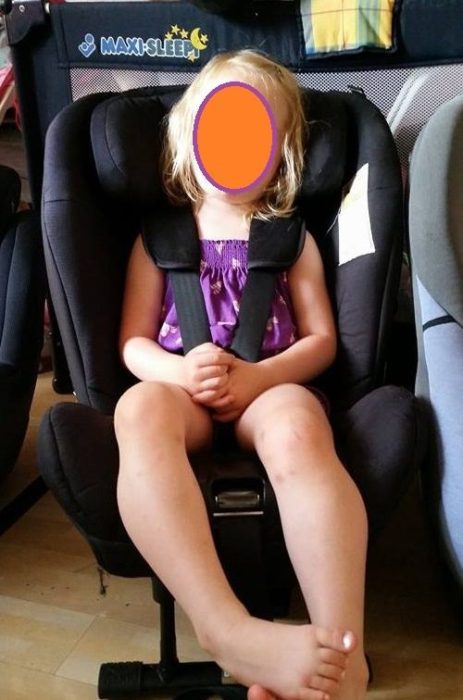
And ‘tadaaa’ here is my final image.
Pin It!

[tweetthis]Hide Your Identity – Photo Guide by @ERFmama #photo #image #newpost #blog #tutorial #FF RT[/tweetthis]
![]()
I hope you found this tutorial useful and that it helped you out! I would really appreciate it if you did me a favour and pinned it.


Therese has completed the ‘Advanced Child Car Seat Training Course’ at TRL (Transport Research Lab) and is a CPD accredited car seat expert. She blogs about in-car safety, car seats, tips, reviews, giveaways and advice. She’s a mum on a mission to change the law and raise awareness. She is also a breastfeeding advocate and gentle parenting promoter who loves cloth nappies, baby-wearing, BLW and co-sleeping/bed-sharing.